Have you ever got that plasmid back from the sequencing facility as a bare sequence with no annotations? Or downloaded that vector from from the vendors site to find its only available in a fasta format with no features? Or maybe your collaborators send you poorly annotated sequences. Maybe your lab-mate uses MacVector but insists on annotating the sequences with a tiny unreadable font or garish colors? What you need is a quick and easy way to annotate the sequence, or change the feature appearance so it looks just like YOU want it. Thats exactly what we added to MacVector 11.
Here’s the idea – over time you build up a collection of plasmids and sequence fragments of the genes and vectors you work with the most. Perhaps you always like to make your favorite gene appears as a striped red box. Now, when you get a new sequence, just run the auto annotation algorithm (Database | Auto Annotate Sequence) and point it at a folder containing your annotated sequences. The algorithm not only finds the matching features and copies them onto your bare sequence, but it also copies the graphic appearance symbol information. Lets look at an example.
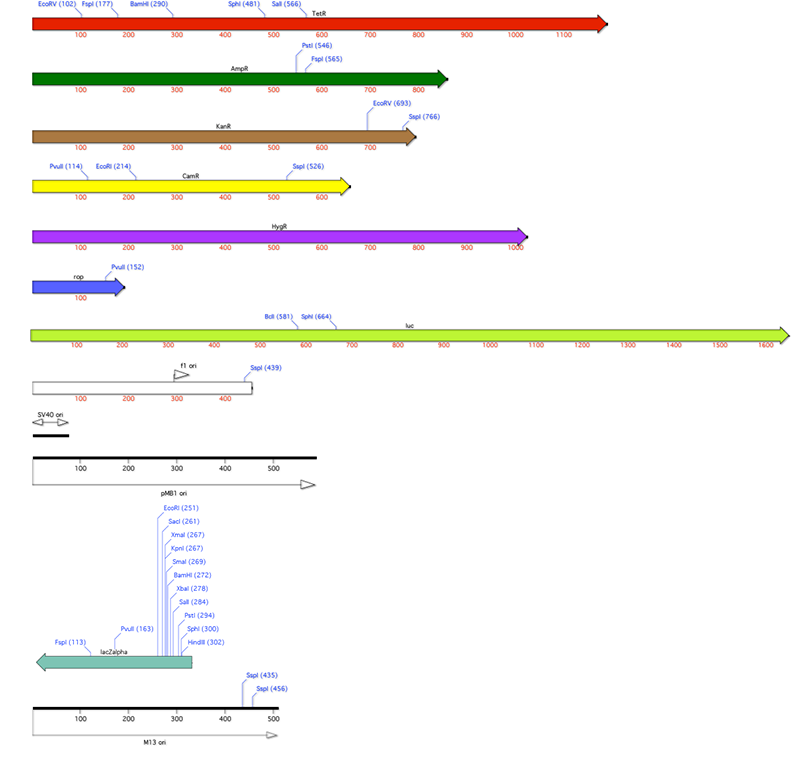
MacVector 11 comes with a large set of pre-annotated vectors. You can find them in the /Applications/MacVector 11/Common Vectors/ folder. We’ve also included an /Annotated Fragments/ folder here with a started set of genes and replication origins you’ll find on many cloning vectors. Here’s a composite graphic image of a selection of those fragments.
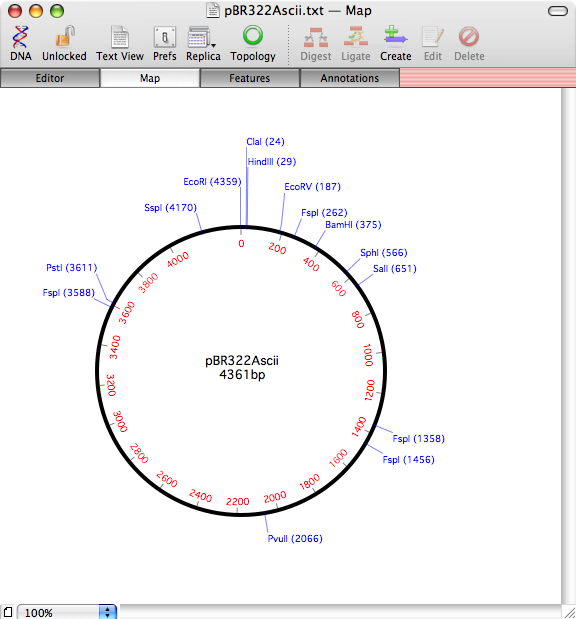
There is a plain text copy of pBR322 in /MacVector 11/Tutorial Files/AutoAnnotation/pBR322Ascii.txt. If you open this file in MacVector and toggle its topology to linear, you’ll see there are no features assigned to the plasmid.

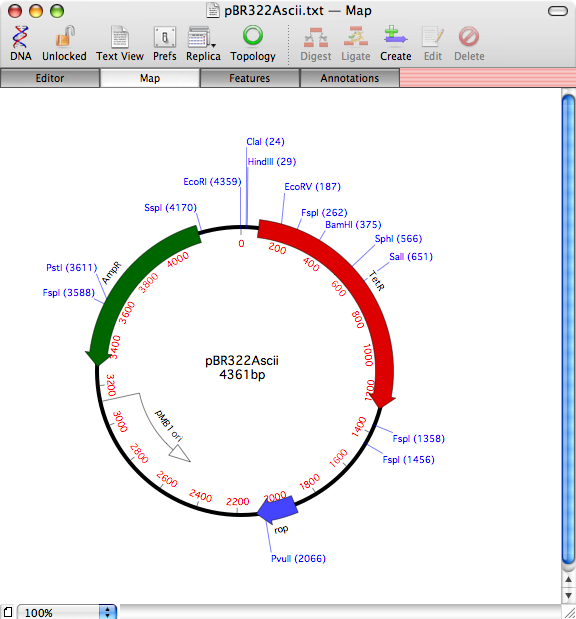
The next step is to invoke Database | Auto Annotate Sequence, then click on the Choose… button to select the /MacVector 11/Common Vectors/Annotated Fragments/ folder. Finally, click on the OK button and the algorithm will search through all of the files in the folder looking for matching features. When complete, a report is displayed – when you close that, you’ll see the newly annotated sequence.
In this case, pBR322 has picked up the tetracycline and ampiciliin resistance CDS features, along with the rop gene and replication origin.
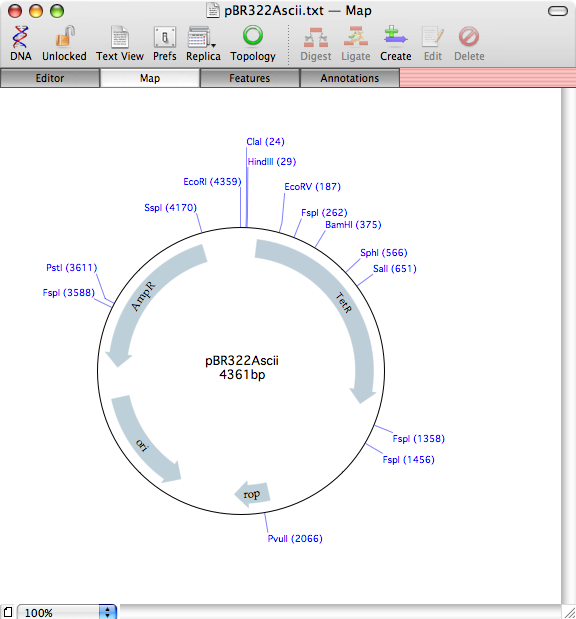
Prefer a different way of graphically displaying the features? Try repeating the analysis, but selecting the /MacVector 11/Common Vectors/NEB/ folder – this contains a selection of vectors available from New England Biolabs, formatted to match the appearance in their catalog.
This time, when the algorithm completes, the features take on the typical appearance seen in the catalog. Note that the CDS features have not been duplicated – MacVector realizes the features already exist and just replaces the graphic symbols. You can also optionally set the algorithm to ignore duplicate features completely, in which case the sequence appearance would have been left unchanged.
You can use the Auto Annotation function to scan any folder containing DNA sequences. They don’t have to be in MacVector format, although features from GenBank or EMBL files will be given the default appearance for the feature type. There is a certain amount of fuzziness built into the algorithm – it can handle mismatches and even a few gaps and still identify matching features. We’ll be posting a more detailed tutorial in the next week with more information about the different parameters and limitations of the algorithm. In the meantime, take it for a spin and build up a collection of curated sequences containing all your favorite genes formatted for that great visual impact in your presentations.


One Comment
This information is very useful for me .thank you!