
MacVector has always given the user great control in being able to customise the map’s appearance. By default the label will show the full text description of a feature and all its qualifiers (see the first metatag in the list below). However, the label can contain whatever text you want it to display. Obviously you do not want to waste lots of time changing multiple labels and so MacVector has metatags to define the information that is placed inside the Label. For example using the code below will show the name and location of a feature. Incidentally this is the default label for restriction enzyme sites as shown in the screenshot below. Note that unique restriction enzyme sites (shown in red) only have the <Description><Start> metatags.
<Description> (<Start>) <Index>/<Count>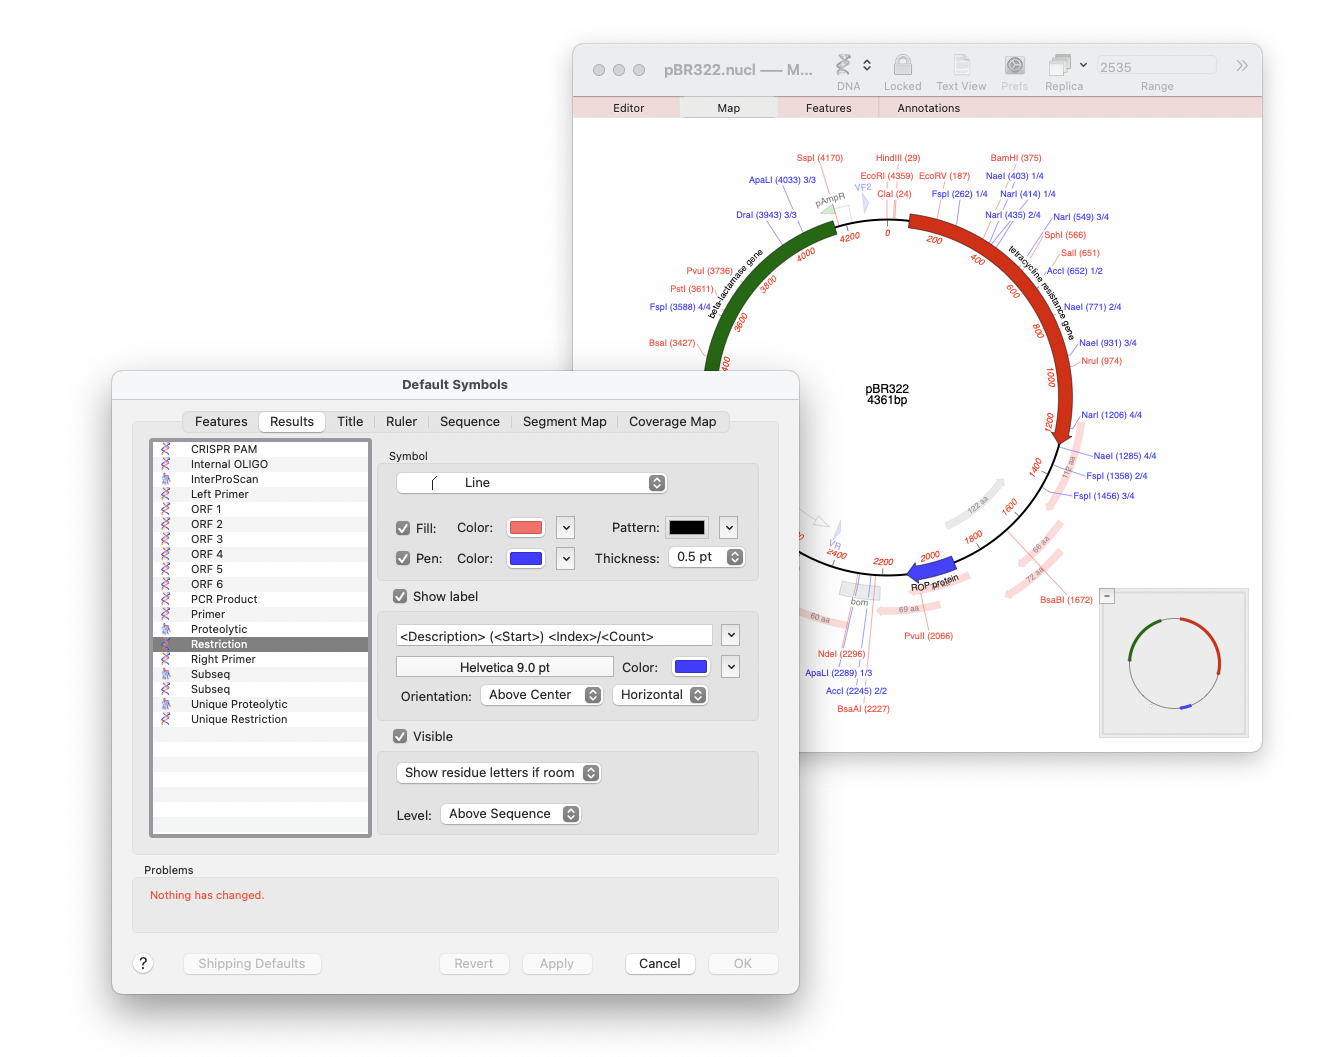
The full list of metatags is:
<Description>or<Desc>the text of the description associated with a feature replaces this tag. In the case of a Restriction Enzyme, this is the name of the Enzyme.<Start>displays the start location of the feature (for an RE that is the cut site).<Stop>displays the stop location of the feature (for an RE that is the cut site and is identical to<Start>).<Size>displays the size of a feature.<Length>(functionally equivalent with the above metatag).<Type>– substitutes the type of feature e.g. “CDS”, or “mRNA” or “source”.
The following metatag applies only to feature graphic types and is disabled for others:
<Segment>shows the position of this feature in multi-segmented features.
The following three metatags apply only to restriction enzyme cut sites and are disabled for other features:
<Total>shows the count of this particular feature type.<Count>shows the count of this particular feature type (functionally equivalent with<Total>).<Index>shows the order of an individual feature in the above number.
Incidentally the last three metatags do provide very useful information on restriction enzyme cut sites, especially for cloning.
e.g. <Desc> (<Index>/<Total>) would generate labels like “BamHI (1/3)”, which means it’s the first cut site our of a total of three, “BamHI (2/3)” second of three etc.
You can also use metatags to display subsets of information in the feature description using qualifier information. Qualifiers are GenBank tags that supply extra information about a Feature keyword other than the type and location that are already supplied. Some Feature Keywords have mandatory qualifers, whereas some are entirely optional and can have none. For example the Feature Keyword CDS might contain the Gene name (/gene), the translated product (/product), the actual translation (/translation) and perhaps even the protein’s function (/function). As an example of a mandatory qualifier the Source Feature Type must contain the /organism qualifier. You can read the full set of Feature Keywords and Qualifiers on the NCBI’s Feature Table page.
The <Description> metatag displays the entire set of Qualifiers. Using the actual qualifier as a metatag will just use that specfic piece of information instead. For example <gene>(<number>)” will display My Gene (1) if the qualifiers /gene=”My Gene” and /number=”1” are present in the feature description. Using a specific qualifier usually provides a far more succinct label than the full <Description>, particularly for feature-rich sequences imported from GenBank or Entrez. Please note that Qualifier based meta-tags are skipped if the qualifier doesn’t exist in the feature description.
If you choose the meta tag <description> for the label (the default setting), MacVector scans the feature data for specific common qualifiers and (if found) uses the text from the highest priority of those qualifiers in the following order of precedent;
- /label – note this is a MacVector-specific addition to the Genbank format.
- /gene
- /product
- /note
- /locus_tag
If none of these are present, but there is just a single qualifier associated with the feature, then the text of that qualifier is used. Otherwise, the entire text of all the qualifiers associated with the feature is used.
Accordingly, if you want to override the visible label displayed with a feature, the preferred approach is to leave the meta tag as <description> but add a /label qualifier with the required text.
Metatags are case insensitive and if a metatag is not found it will be removed from the label string.
Finally to make all this easier there is a popup menu in the Feature Symbol editor that lets you view all of the available meta-tags and insert them into the label. Click on the small triangle to the left of the label edit box.
