Although Apple are well known (notorious?) for always providing mice with only a single obvious button, in reality the Mac interface from early versions of MacOS all the way to macOS Big Sur, plus many Mac apps, have always used right click menus (or more accurately “context sensitive menus”) to provide extra functionality.
MacVector is no exception and there are a lot of shortcuts and tools that can be accessed using context-sensitive menus. You can access these by either right-clicking in a window, or by [ctrl] clicking if you don’t have a right-clickable mouse/trackpad. For the most part, it doesn’t matter where in each window you right-click – the same menu will appear. However, the menus may be slightly different depending on items you have selected in the current tab.
Here’s an overview of many menus that you can see throughout the various sequence editors in MacVector. At the end you will find some very useful tools for Assembly Projects and Align to Reference. But let’s first look at the different tabs of the single sequence editor.
Editor tab
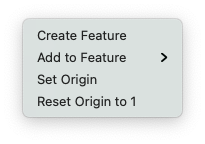
The menu shown does vary depending on whether then topology is linear or circular (Set Origin), whether the origin is non zero (Reset Origin to 1) and whether you have some sequence selected (Add to Feature).
Create Feature – creates a feature from the current selection.
Add To Feature – lets you add the current selection as an additional segment to an existing feature.
Set Origin – for linear sequences, lets you change the numbering origin to a specific positive or negative value.
Reset Origin to 1 – for linear sequences, resets the numbering origin.
Map tab
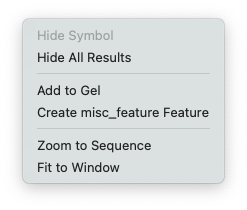
Again this context menu is variable. Its content will change based on the object(s) you currently have selected. In this case, it was a restriction enzyme site (Add To Gel).
Hide Symbol – hides the currently selected graphical object.
Add to Gel – for Restriction Enzymes, adds the current molecule cut with the enzyme to the currently open Agarose Gel window. Will create a new gel if necessary.
Create misc_feature Feature – create a new feature based on the selection. This will vary depending upon the selected graphic object. For an RE Site it’s a misc_feature, for an open reading frame, it will be a CDS.
Set Circular Origin – for circular molecules, sets the “12 o’clock” position to the selected restriction site.
Zoom to Sequence – “zooms” the display to the current selection.
Fit to Window – equivalent to double-clicking in the window to reset the scale to match the current window size.
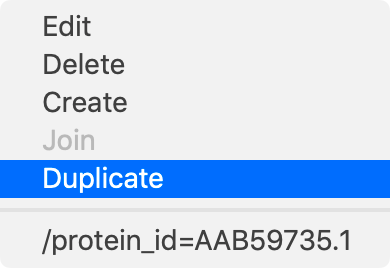
Edit – edits the selected feature.
Delete – deletes the selected feature.
Create – creates a new feature with the current selection in the Editor tab.
Join – if you have two or more features selected, this will join them into a single segmented feature.
Duplicate – duplicates the selected feature.
/protein_id= – this item varies depending on the feature selected. In this case it opens a browser and attempts to find the protein with that specific ID in the NCBI database.
Results window
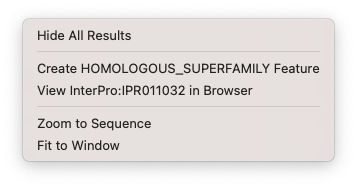
In Results windows where you can annotate the results back to the original sequence, then right clicking allows you to directly annotate that results. Such analysis tools include, InterProScan, Restriction Enzyme Analysis, ORF analysis, Primer design, and more.
Hide All Results – hides all of the result graphics.
Create XXX Feature – annotates that result to the orignal sequence. The feature created depends on the analysis that has been run.
Zoom to Sequence – “zooms” the display to the current selection.
Fit to Window – equivalent to double-clicking in the window to reset the scale to match the current window size.
The Align to Reference and Contig Editors
The Align to Reference and Contig Editors are very similar, except the Align to Reference Editor has both a reference sequence AND a consensus sequence whereas the Contig Editor just has a consensus sequence. Both have an extensive context sensitive menu. Lets look at the Contig Editor first – this is the Editor you use to view contigs generated by phrap, velvet or SPAdes in the Assembly Project window.
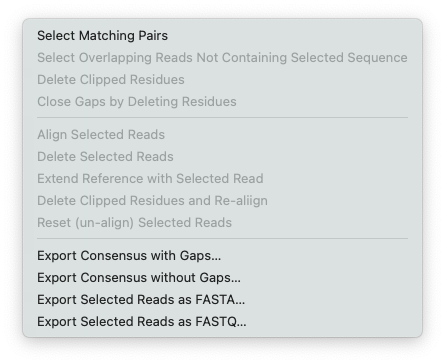
Export Consensus with Gaps – saves the consensus as a MacVector .nucl sequence, including any gaps.
Export Consensus without Gaps – saves the consensus as a MacVector .nucl sequence, but removes the gaps. This is the more common function you would typically use for saving the consensus. This is a shortcut to the File | Export Consensus As… function.
Export Selected Reads as FASTA – saves the currently selected reads into a single fasta formatted file.
Export Selected Reads as FASTQ – saves the currently selected reads into a single fastq formatted file. This and the FASTA version are shortcuts to the File | Export Selected Reads As... menu item.
Select Matching Pairs – if you have assembled paired reads, and if the names of the reads follow one of the typical naming conventions, e.g. appending /1 and /2 to the read names, or having “1” or “2” in the description, this will select the appropriate matching pair.
Select Overlapping Reads Containing Selected Sequence – one of the most powerful tools in the Contig Editor. Suppose you have a SNP, or a variant base in a repeat sequence. Select the residue(s) and this command will select all of the other reads that have those residues at that position. In conjunction with Select Matching Pairs, this is a great way of finding, selecting, then exporting pairs of reads representing specific SNPs or repeats in an assembly.
Circularize Consensus – None of the assembler algorithms automatically detect circular sequences. But MacVector will automatically look at the ends of contigs and if there is a significant overlap, will offer to create a new circular sequence using this command.
Here’s the menu invoked from the Align to Reference Editor.
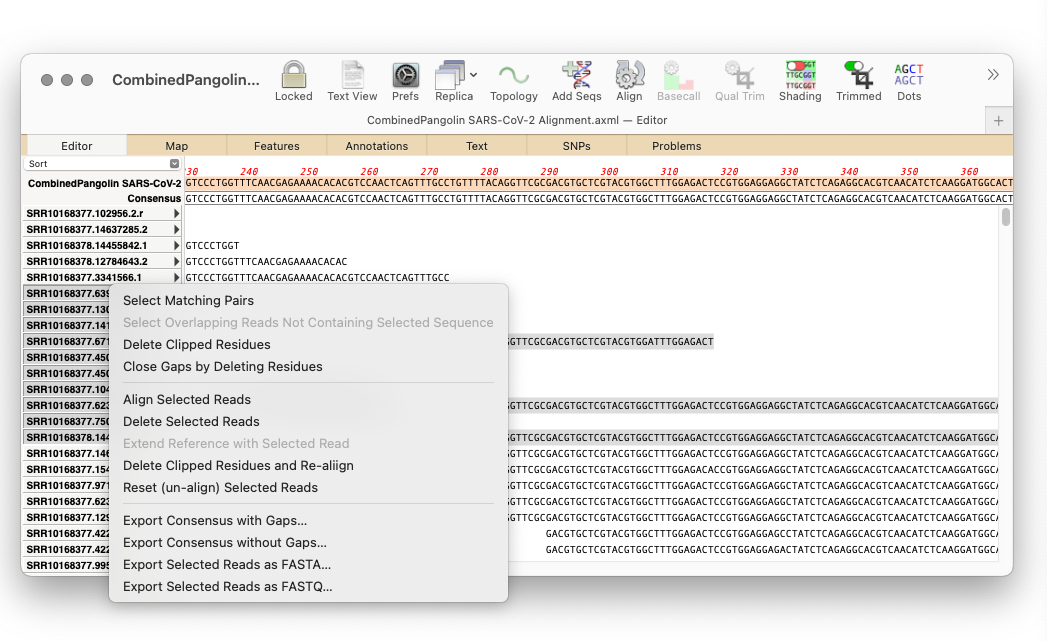
Most of the menu items are the same as for the Contig Editor, but there are a few additions that are greyed out in the Contig Editor
Align Selected Reads – a shortcut to align just those reads you have selected
Delete Selected Reads – does what it says
Reset (un-align) Selected Reads – the only way of actually reverting a read to its unaligned state.
Extend Reference with Selected Read – if you have a linear reference and a read extends beyond the left or right end of the sequence, this lets you extend the reference with the contents of the read. This is a great tool for building up an extended reference to create e.g. a patch sequence to use in subsequent assemblies to join together two contigs using reads you have isolated using the other Align to Reference tools.
