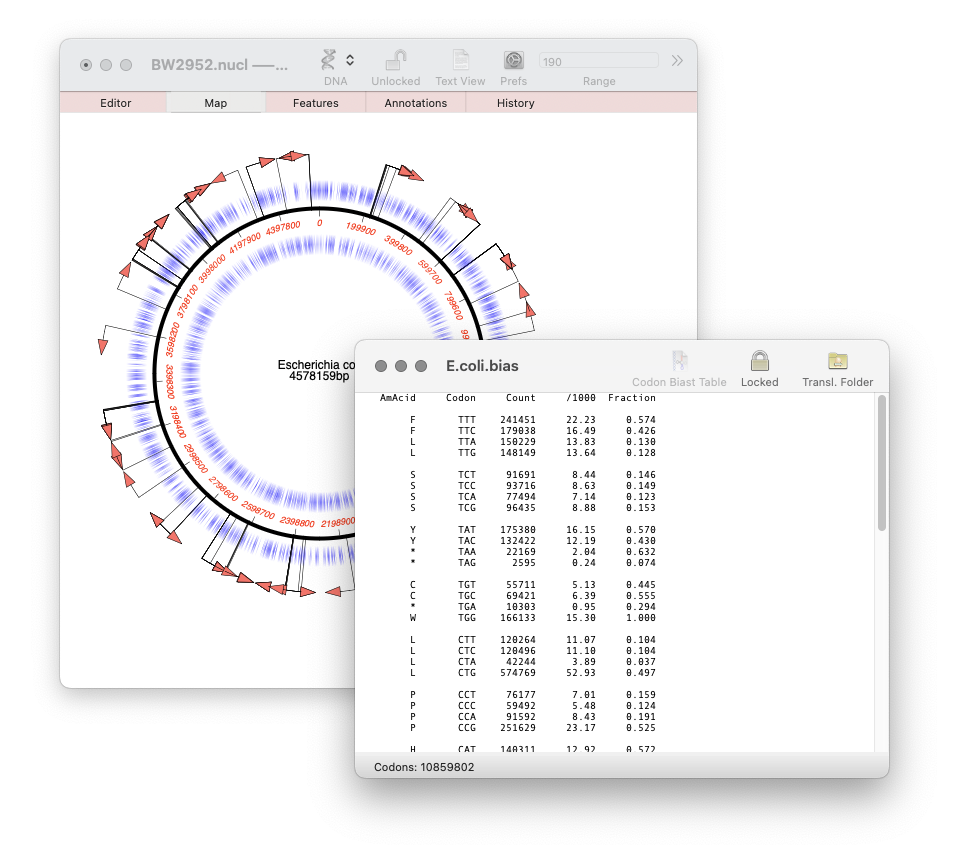
Our latest release, MacVector 18.7, has a new Codon Usage Table viewer. You can use this to generate your own codon usage table (CUT or .bias) files. You can use codon usage tables to optimize codon usage of CDS features for enhanced expression in a different organism. They can also be used in the Nucleic Acid Toolbox to predict protein coding…
Our latest release, MacVector 18.7, sees the addition of Minimap2 to Assembler’s sequencing toolkit. So if you have the Assembler module, you can now map noisy long-read data from Pacific Biosciences or Oxford Nanopore to one or more genomes. Minimap2 is a reference assembler similar to Bowtie2. But whereas Bowtie2 excels at mapping “short reads” (500nt or less) to…
MacVector 18.7 has just been released. If you are eligible for this release you will be prompted to upgrade, otherwise go to MACVECTOR | CHECK FOR UPDATES… and follow the prompts to be automatically upgraded. If your license is not eligible then why not upgrade? Overview MacVector 18.7 introduces a History tab to track the…
Quality scoring of Assemblies and Align to Reference alignments can be visualized directly on the sequence. Residues can be shaded according to their quality scores. These can be displayed anywhere quality values are available, including de novo and reference assemblies in Assembler and Align to Reference alignments. The intensity of the shading of residues indicates…
MacVector’s Agarose Gel tool can be used to quickly design a restriction digest to screen minipreps following a ligation. Replicate your ligation in MacVector. Select the two sites, for subcloning your targeted gene, and click DIGEST. Drag the digested fragment from the Cloning Clipboard to your vector click LIGATE. Create your agarose gel with the…
If the graphics in a nucleic acid sequence Map tab appear somewhat “washed out” it is because the graphic items represent common features that MacVector has found that are not annotated on the sequence. For example, here are the Map and Feature tabs of an unannotated cloning vector; You can see a number of features…
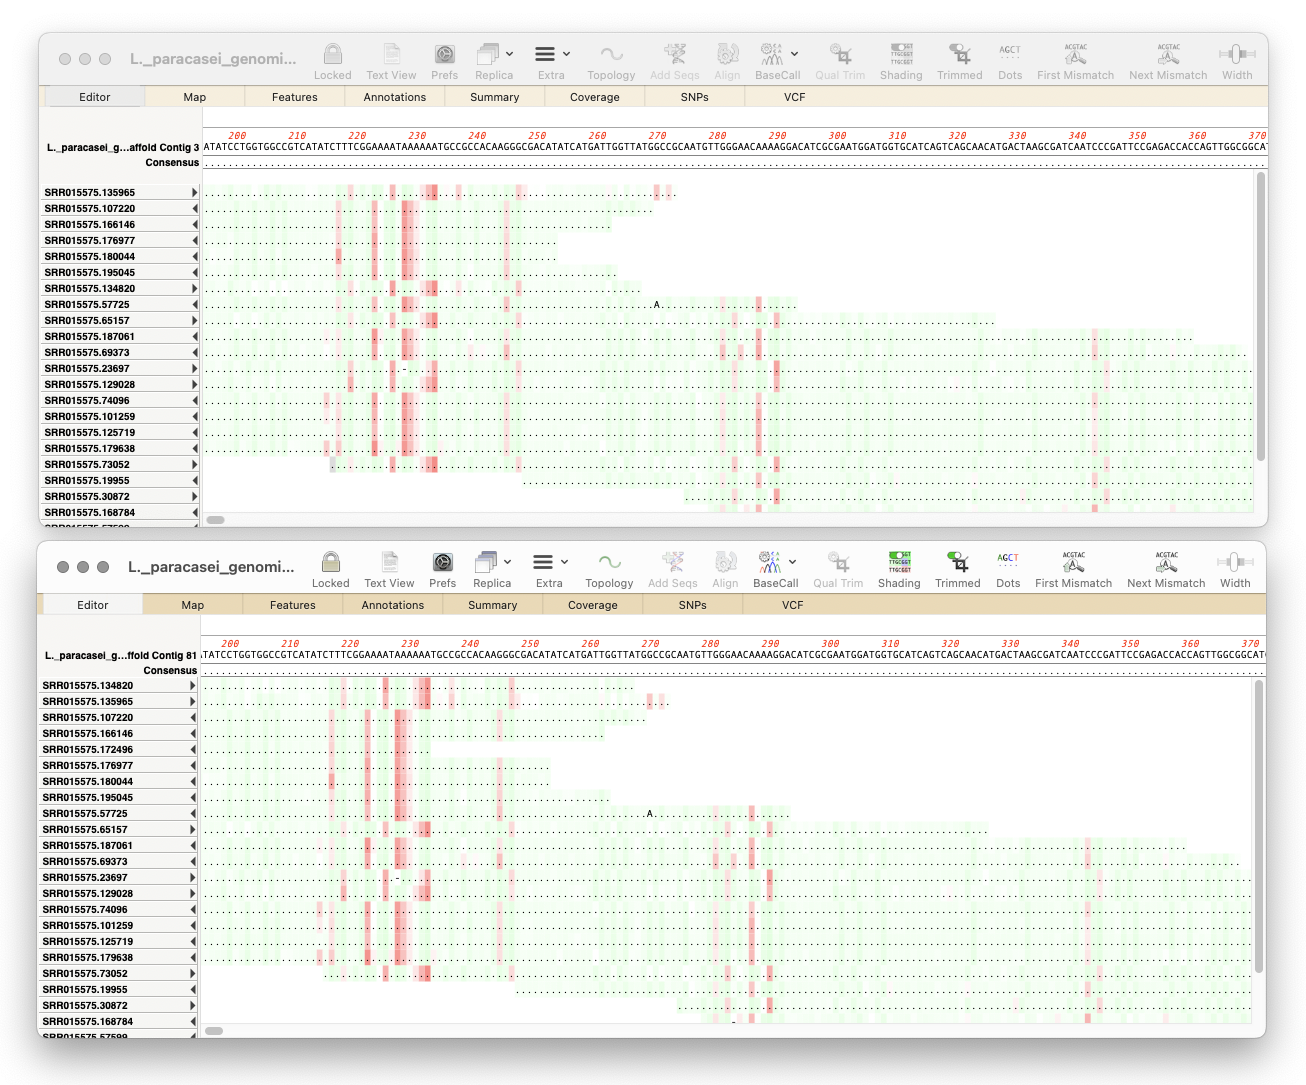
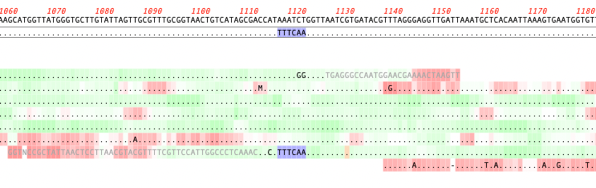
The MacVector alignment algorithms are usually pretty good at finding the optimum alignments of reads against a reference sequence. But, very occasionally, they may get confused by repeats or other anomalies in the sequences. Or perhaps you have made after-the-alignment edits: for example, in the Align to Reference Editor, you can insert residues by holding…
Many of our users may be familiar with the ability of Sequencher to semi-automatically trim poor quality sequences from the ends of Sanger ABI reads. Although it is generally not necessary to do this in MacVector because most of the algorithms can automatically handle poor quality data, there are times when it can be beneficial.…
The Dot-Plot analysis (Pustell DNA Matrix) function in MacVector is an extremely powerful way of quickly getting an overview of the similarities between a pair of sequences. However, it can also be used to identify repeats and inversions in a single DNA sequence simply by comparing a sequence to itself. For example here is the…
Quickly viewing the recognition sequence and cut site of a restriction site is very easy in the Map tab. By default MacVector’s Scan DNA For… tool will automatically display restriction enzyme recognition sites in the Map tab. If you hover your mouse over a restriction site, a tooltip will show you the restriction enzyme recognition site, the location of the cut…