
In last week’s tip we showed you how to filter NGS read data to pull out and assemble just those reads that represent a specific gene of interest. Now let’s see how to annotate the single contig we generated and compare that to a reference genome. First, from the Contig Editor, you can save the consensus in MacVector .nucl format using File | Export Consensus As..
Next, we can open that file and choose Database | Auto-Annotate Sequence…
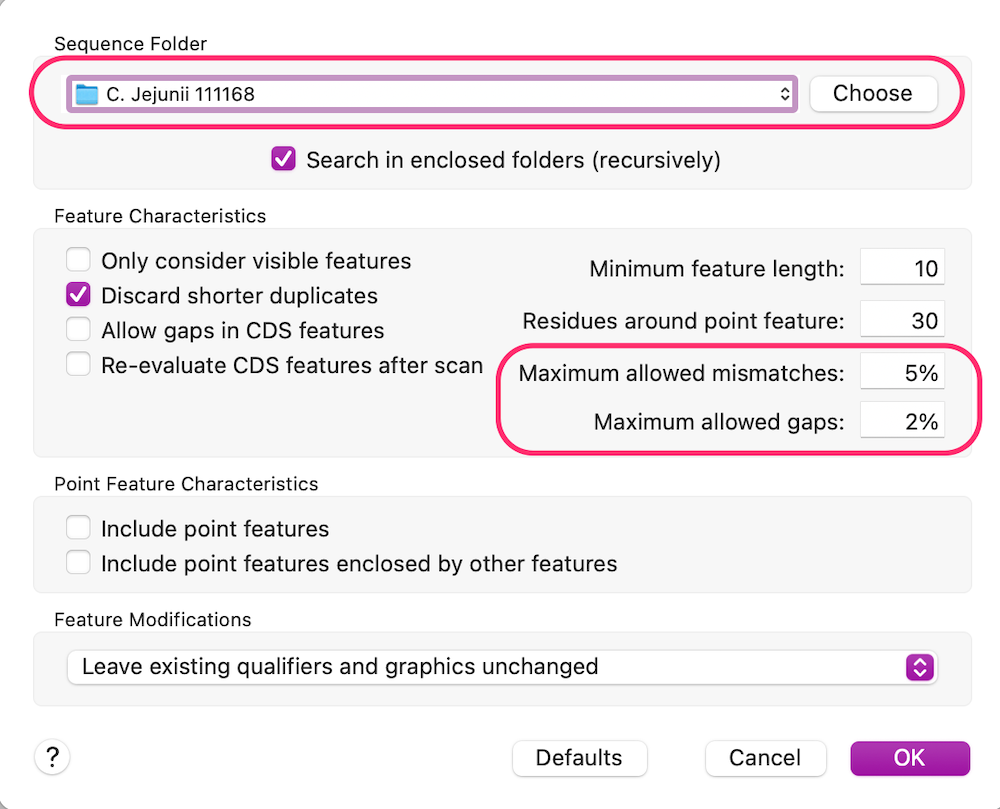
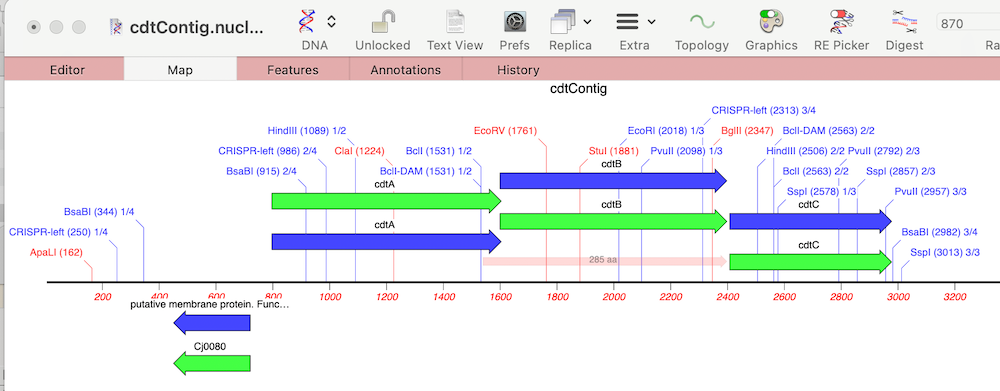
In this case we have chosen a Sequence Folder where our reference genome is located. Note that you can have many files in that folder and MacVector will simply find the best matches. Because this is a related genome to ours, but not expected to be a perfect match, we have loosened the mismatches and gaps parameters a little. After clicking OK, MacVector looks at the DNA sequence each feature in each file in the Sequence Folder and looks for a match in our consensus sequence. In this case it finds the corresponding cdt operon and annotates accordingly;
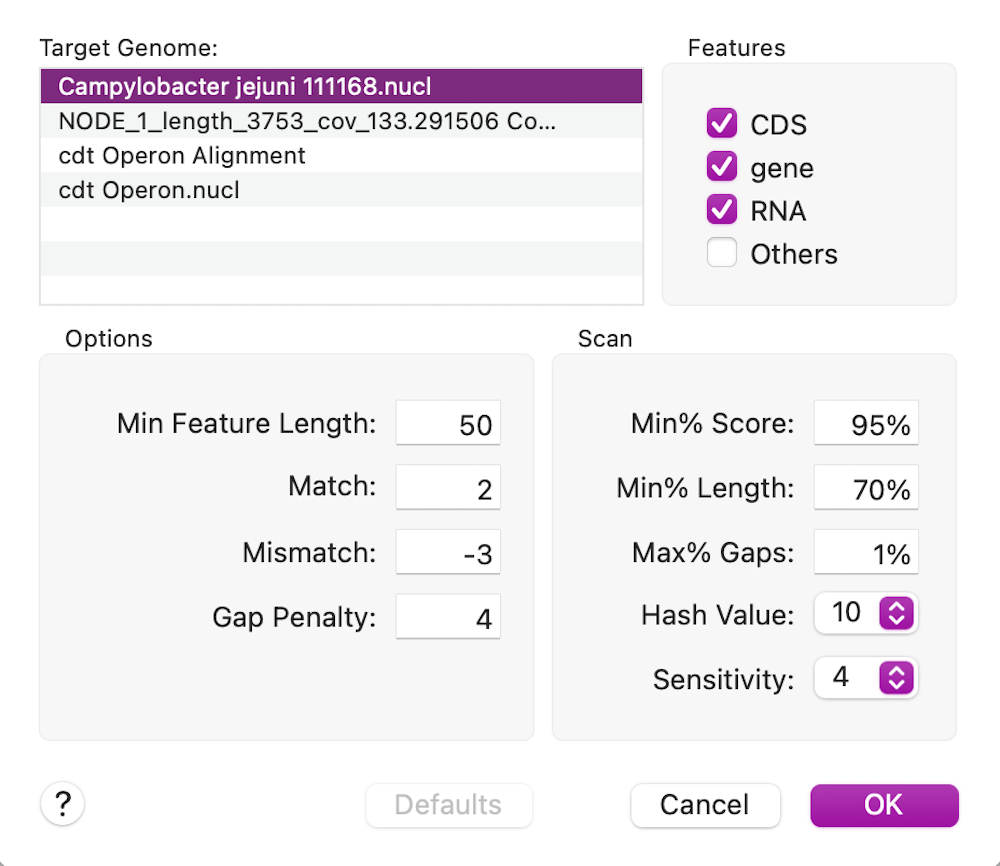
Finally, we can look to see what differences there are between the cdt genes on our new sequence versus the reference using Analyze | Compare Genomes by Feature… and selecting our reference genome from the list of open sequences.
In this case, the cdtB CDS feature is 100% identical to the reference cdtB CDS sequence (this is for the translated protein for CDS features);

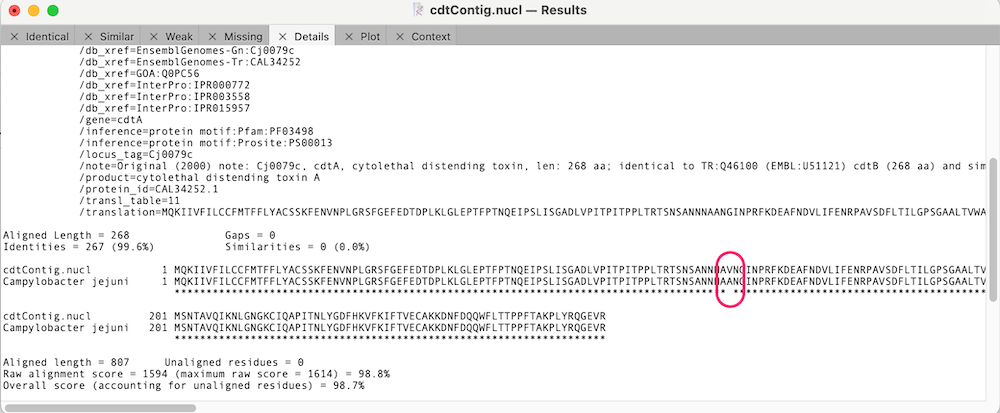
Whereas the other cdt CDS features differ but are very similar;
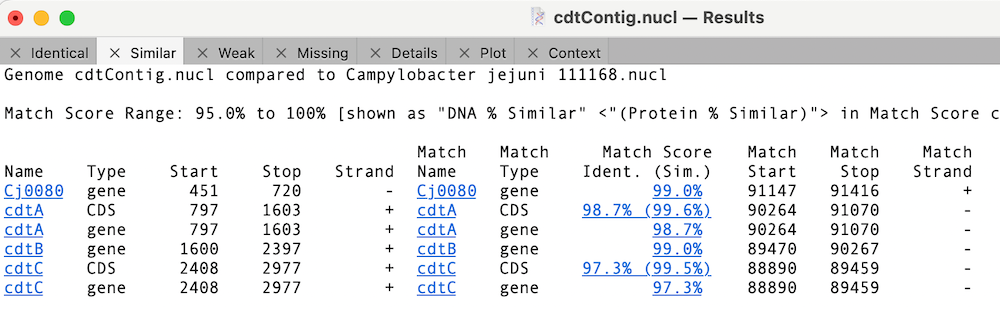
You can click on the Match Score column links to view the individual similarity data. In the case of cdtA, there is just a single changed amino acid;
The MacVector team.