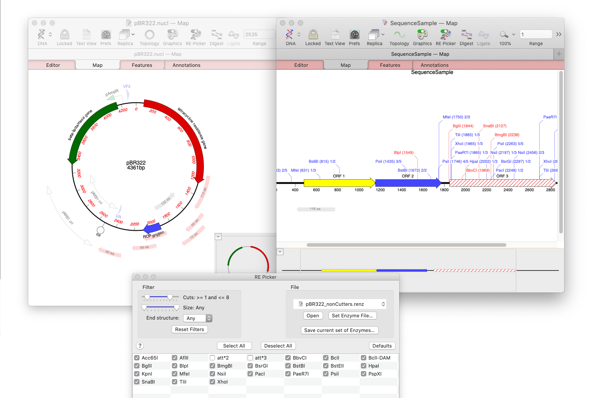
It’s generally useful with restriction enzyme based cloning to know what restriction enzymes will cut your vector and not cut your insert, or vice versa.
There are a few ways to accomplish this with MacVector, but a useful way is to prepare a file of enzymes that do not cut your vector. This is especially useful if you want to repeat this for multiple inserts with the same vector.
You can quickly do this with the RE Picker. The RE Picker shows an interactive list of restriction enzymes. Only those that are shown in the table and checked are displayed in the Map tab. However, you can change the criteria to only show enzymes that do NOT cut.
- Open up your vector and switch to the MAP tab.
- Click on the RE Picker button again to show the RE Picker window.
- Click SELECT ALL to select all enzymes
- Slide both the left and right sliders off the CUTS control all the way to the left.
The Cuts label should now indicate “0”. The enzymes now visible in the RE Picker are all those in the default restriction enzyme file that do NOT cut the target molecule.
- Click SAVE CURRENT SET OF ENZYMES and choose a relevant name e.g. [VectorName-NoCutters).renz.
- Open up your insert sequence.
- Click RE Picker
- Click SET ENZYME FILE and choose your NonCutters file.
- Make sure the CUTS control is set appropriately.
- Click SELECT ALL to ensure all enzymes are selected and will be displayed.
Only enzymes that cut your insert will now be displayed.

If you are designing a screen for clones after a ligation, then check out our Agarose Gel tool video
