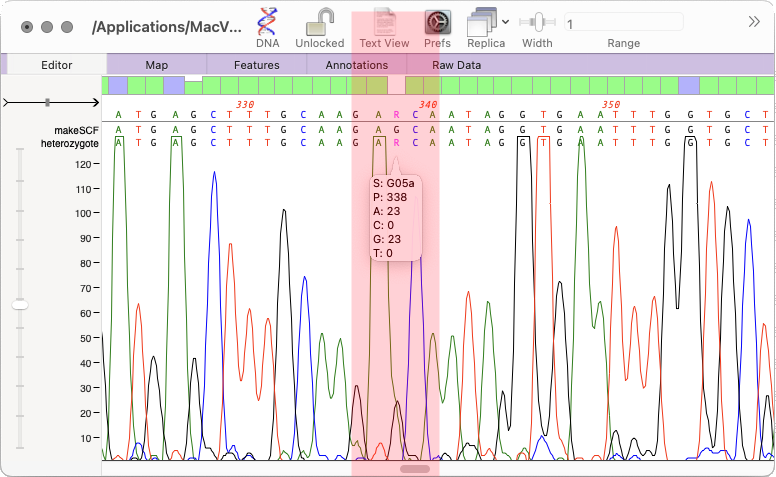
The heterozygote analysis tool allows you to either view heterozygotes in Sanger trace files or to permanently change the basecalled sequence with an ambiguity representing the called heterozygote. The tool works on multiple trace files in the Assembly project manager or the Align to Reference editor. You can also run it on a single trace file in the Single Trace Editor. But…
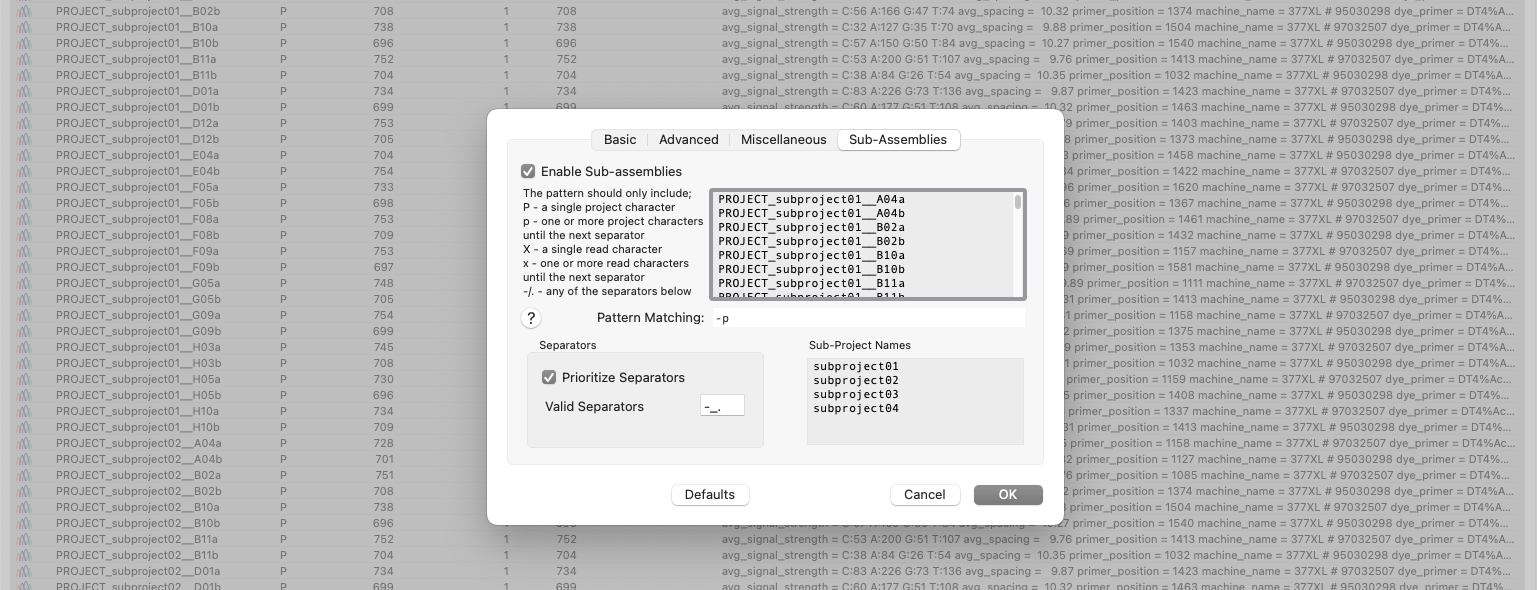
New to MacVector 18.6 is the ability to sort and assemble reads from different datasets into individual sub-projects. This functionality is located in the phrap parameters dialog. When enabled and configured appropriately for your dataset it will automatically break out the input reads into sub-projects to be assembled separately. A simple pattern-matching text box lets…
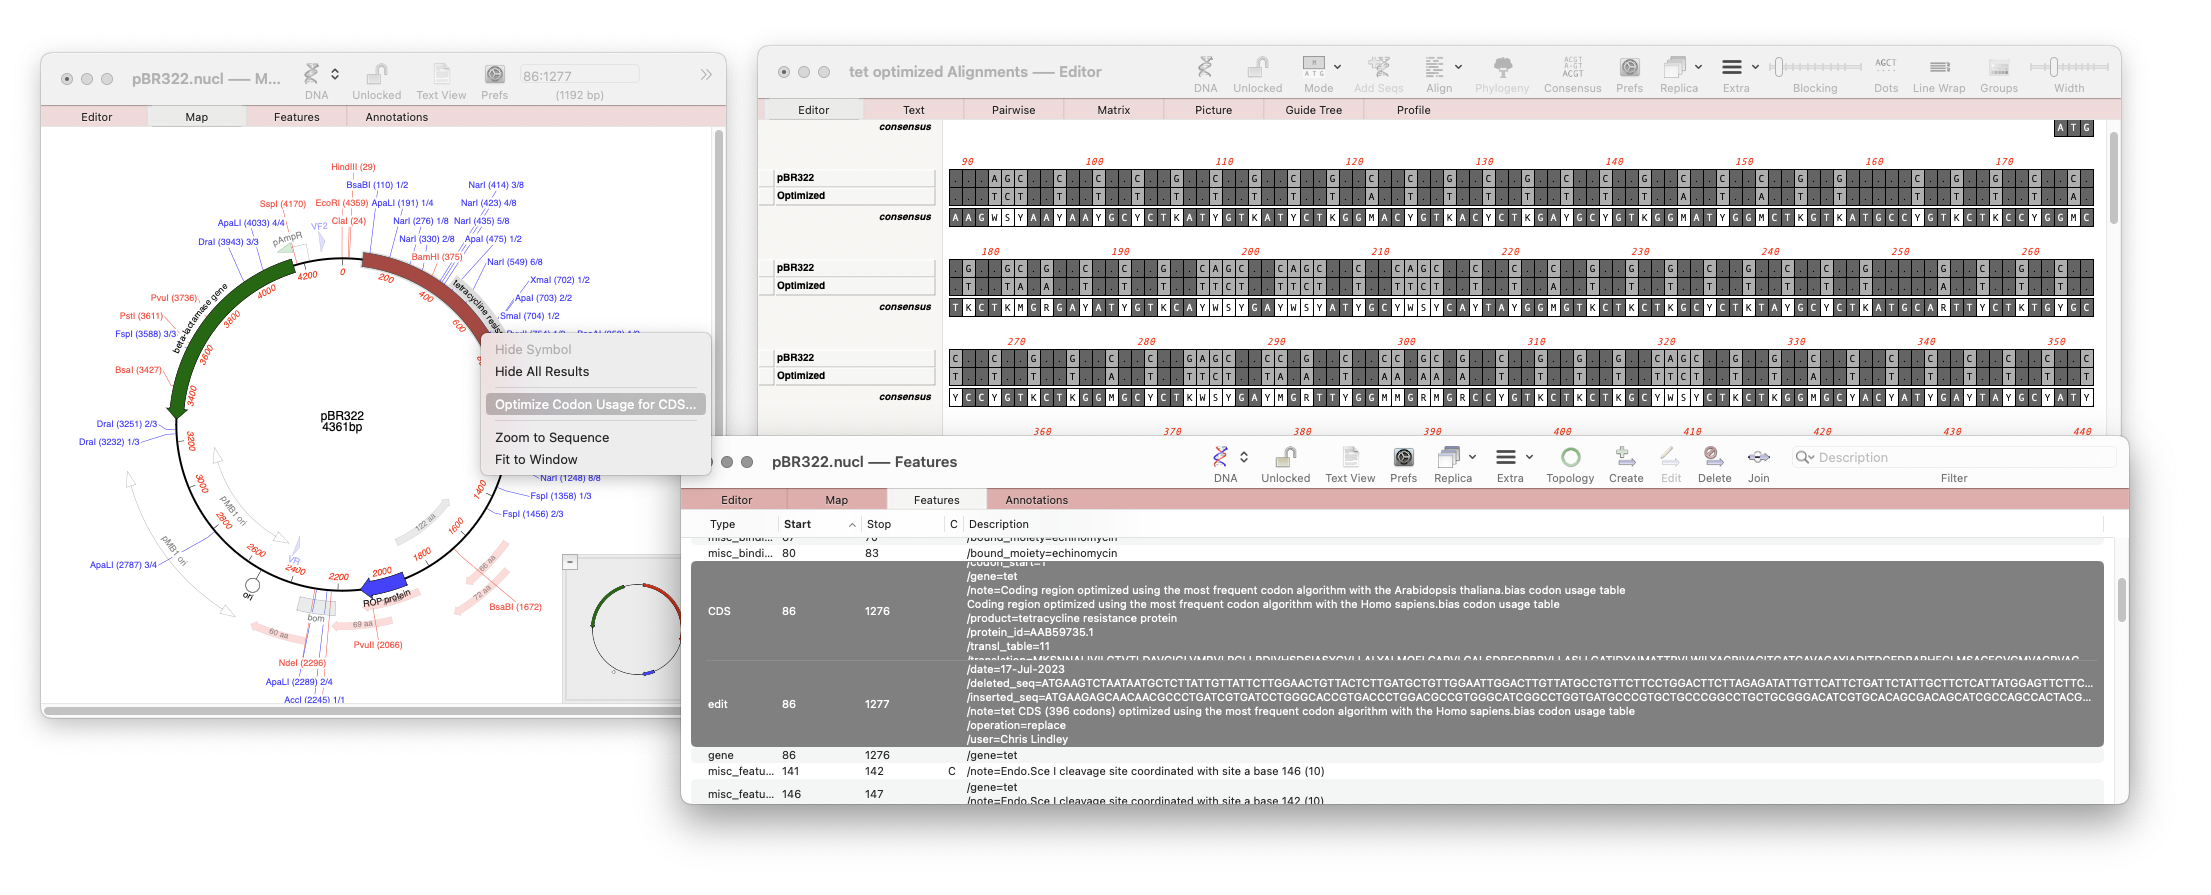
Our latest release, MacVector 18.6 has a new tool that will directly optimize codon usage of CDS features for enhanced expression in a different organism. The new tool pulls together multiple tools into a one step procedure which can be run by selecting a CDS feature in your nucleic acid sequence and running Analyze |…
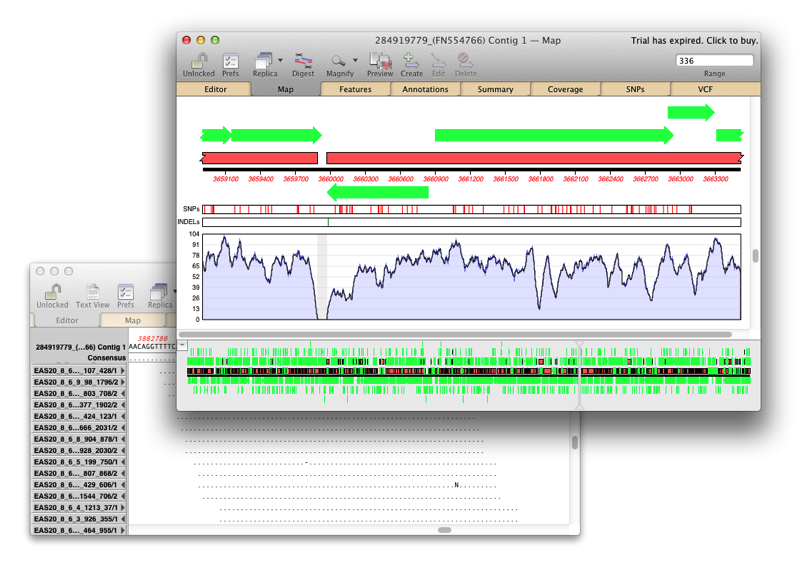
Assembler is a plugin for MacVector that provides comprehensive sequence assembly functionality. Assembler is fully integrated into MacVector and allows you to manage sequencing data with the familiar MacVector style. You can design primers directly on a contig or BLAST that contig to identify it. MacVector’s Assembly Project manager Like Sequencher, MacVector with Assembler has…
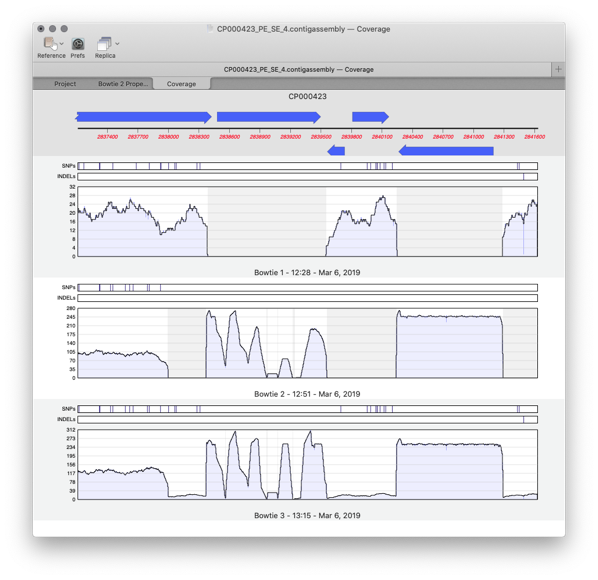
Assembler is fully integrated into MacVector and allows you to manage sequencing data with the familiar MacVector ease. de novo sequence assembly using Phrap, Velvet and SPAdes with Flye for PacBio and Oxford Nanopore. Reference Sequence Assembly: Map millions of reads against genomes, transcriptomes or other reference sequences using Bowtie2. Compare Genomes: Compare two related annotated…
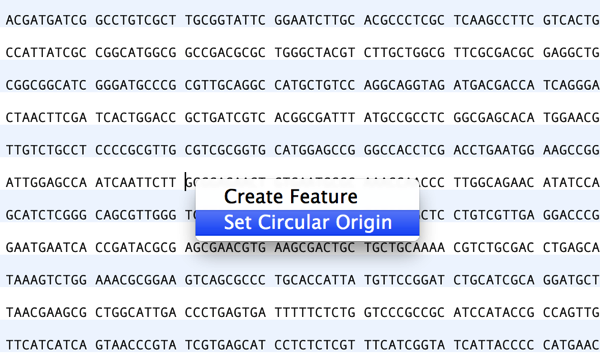
Preserving sequence numbering is particularly useful if you want to work on a smaller more manageable region of a large chromosome but wish to retain the original numbering. When you copy a section of a larger sequence and paste the copy into a new MacVector sequence window (or use FILE | NEW FROM CLIPBOARD), the…
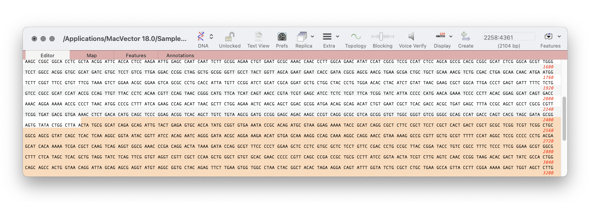
To see the distance between any two points on a sequence is easy. For example select one restriction enzyme site, hold down SHIFT and select the second. The start, stop and length will be shown in the Range Selector (top right corner of every window – see images below). But if you want to see…
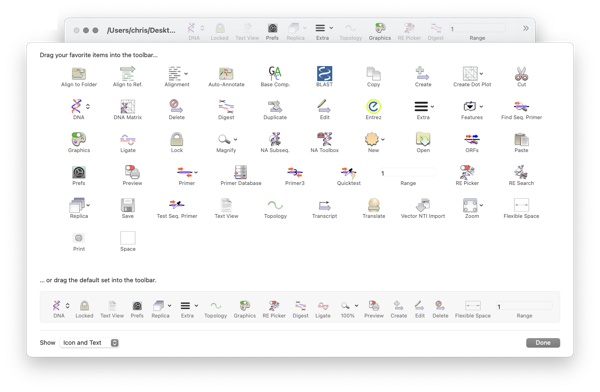
Like many Mac applications, MacVector takes full advantage of macOS’s ability to add, delete and rearrange the action buttons on window toolbars. To make these changes, right-click (or [ctrl]-click) in the gray space on any toolbar and a context-sensitive menu will appear. Choose Customize Toolbar and a dialog will be displayed with all of the…
In MacVector 18.5 we added a new tool to call heterozygotes in sequencing reads. The heterozygote analysis tool allows you to either view heterozygotes in Sanger trace files or to permanently change the basecalled sequence with an ambiguity representing the called heterozygote. The tool works on multiple trace files in the Assembly project manager or…
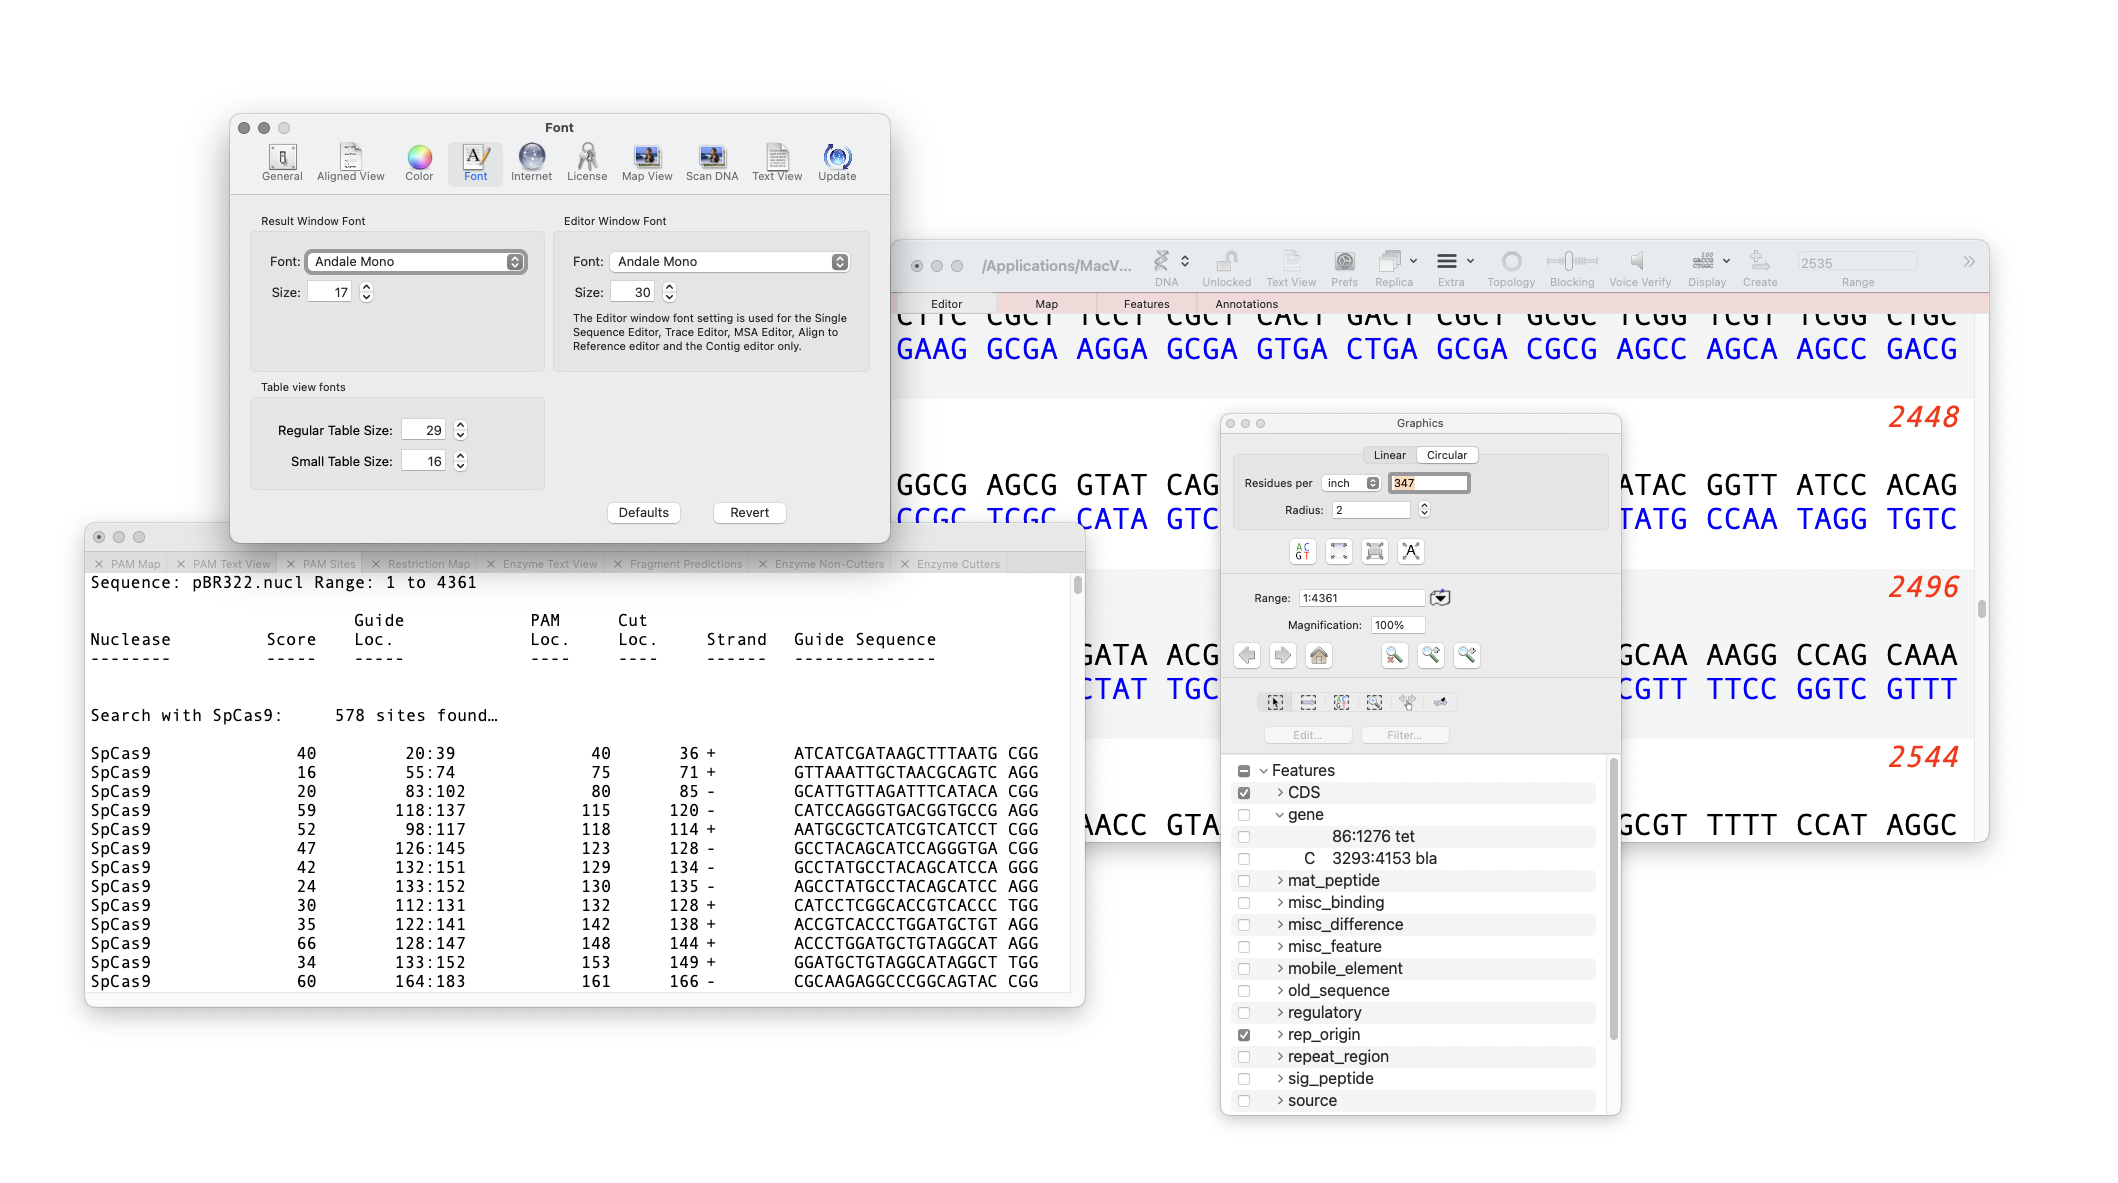
MacVector is very customizable in how you can produce graphical maps of sequences, assemblies, alignments and more. You can also change the default appearance of MacVector itself. The font used in the Editor and Results window can be changed and increased in size. You are limited to using fixed width fonts (such as Andale Mono…