
For many years now, Apple has encouraged developers to create applications that run in a “Sandbox” on macOS. In fact, for the last few years, any application downloaded from the Apple App Store must be set to run in a sandbox. This protects your computer and your data from intentional or accidental data access or corruption from a rogue or poorly written application.
The next version of MacVector (26.0 – we are adopting the Apple yearly numbering convention) will be released soon and has been coded to run in a sandbox.
What does this mean for MacVector users?
There’s a technical explanation of macOS Sandboxing below. However, what this means in practice is that when MacVector 26 runs for the first time, it is assigned a specific section of your hard drive that it has read and write access to. This is always in your account home folder and has a specific location.
<Your Home Folder>/Library/Containers/MacVector/Inside the /MacVector/ folder is a /Data/ folder that has the same directory structure as your home folder. However, most of the directors are empty or have shortcuts to other folders if you have specifically given permission.
For most applications you might use, or download from the App Store, these details are not important – you open an app, ask it to open a file, tell it where to save a file and all is good. The key is that YOU specifically told the application which files to open and where to save them, giving explicit permission for the app to do that.
The problem with MacVector (and many other high tech applications) is that it relies on a lot of auxiliary files for functionality – Restriction Enzyme files, Scoring Matrices, Primer data etc. These all have default files that you may not have specifically selected. Accordingly macOS will deny MacVector access to those files, unless they are located in the /Containers/MacVector/ folder. MacVector 26 copies auxiliary files into the appropriate location in that directory so that it has direct access. The actual location (enforced by Apple) is a mind-numbingly long url.
<Your Home Folder>/Library/Containers/MacVector/Data/Library/Application Support/MacVector/If you navigate to that location you will see something like this:
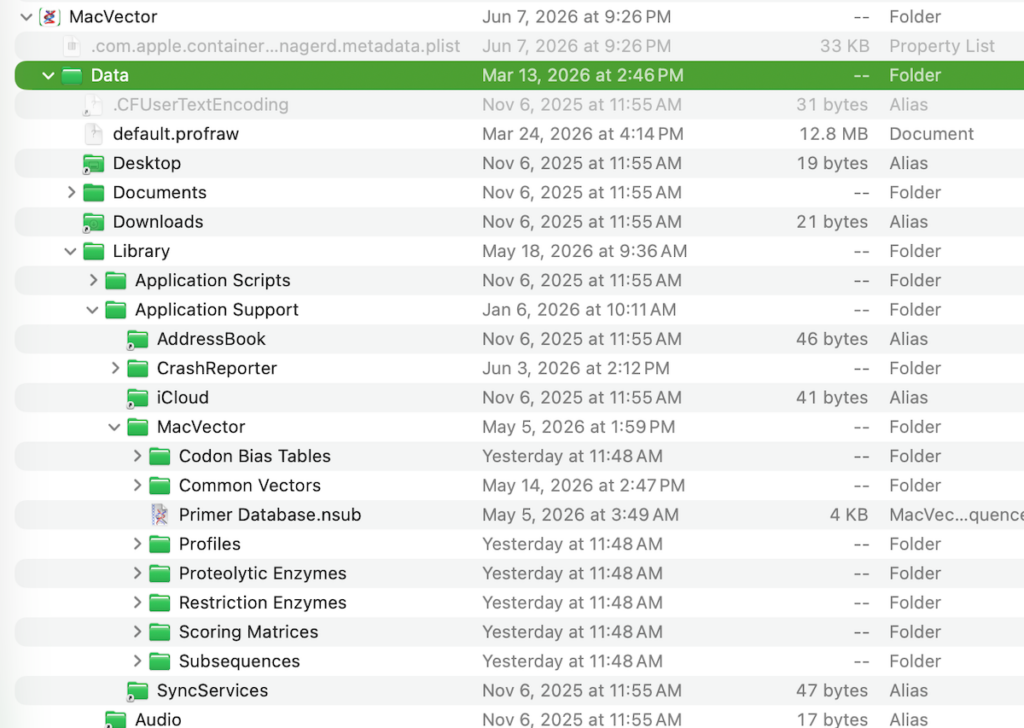
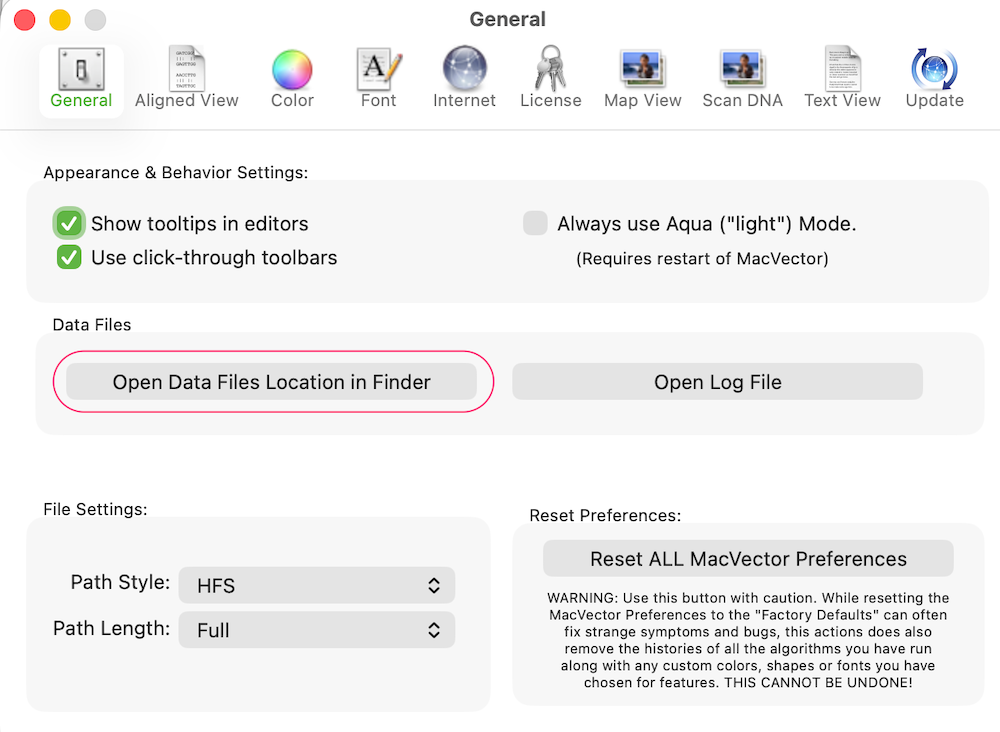
This is where all the default auxiliary files are now located and you will see that the /MacVector/ folder structure replicates the installation MacVector folder in /Applications/MacVector/. Now, with any analysis you can always choose a different auxiliary file to use and that can be located anywhere on your filesystem that you have access to (because you chose it). Or you may prefer to keep your auxiliary files in the MacVector sandbox folder. In which case, MacVector 26.0 has a handy button in the General Settings to drop you right into that folder (you may also see the MacVector log file which is now in a very obscure location!).
Existing auxilary files and MacVector 26
When you launch MacVector 26 for the first time it will scan your existing auxiliary files folder in the MacVector application folder and attempt to copy any modified files into the new location. So you should not lose any customisations. However, this procedure is not failsafe. Also any auxiliary files stored outside the MacVector application folder will need to be manually added to the new location.
We will be publishing more posts on sandboxing during the MacVector 26.0 release.
MacVector 26 will be released later this month.
macOS Sandboxing
The macOS App Sandbox is a kernel-level access control technology that confines applications to a restricted environment. It operates on a “deny by default” principle, meaning an app cannot access the file system, network, or hardware unless explicitly granted specific permissions, known as entitlements.
Understanding the sandbox involves its core components, how permissions work, and its impact on your system:
The Container Principle
When an app is sandboxed, it is assigned a unique, isolated directory on the system (its “container”).
- What it can do: The app has full read/write access to its own container, which holds its preferences, caches, and app data.
- What it cannot do: By default, it cannot read or modify files in other applications, system folders, or the rest of your hard drive.
Entitlements and Capabilities
Developers must explicitly declare the resources their app needs to function in their Xcode project. Common entitlements include:
- Network access: Sandboxed apps don’t get internet access by default and must specifically ask for client or server network permissions.
- Hardware access: The app must ask for permission to use the camera, microphone, or location services.
- File access: Since apps can’t natively browse your whole drive, they use mechanisms like the Security-Scoped Bookmarks API. This lets you grant the app temporary or permanent access to specific files or folders you choose through an Open/Save dialogue.
Why Apple Requires It
Sandboxing protects user data and the operating system by restricting the harm a compromised app can cause. If an app (or a malicious plugin inside it) is exploited, the attacker is contained within that app’s sandbox and generally cannot access your personal files or install malware elsewhere on the system.
- Mac App Store requirement: All apps distributed through the official Mac App Store are required by Apple to use the App Sandbox.
- System protection: It isolates app processes from one another so they cannot interfere with each other’s data or memory.