Starting with MacVector 13 all analysis results for an individual sequence are collected into a single tabbed result window to reduce window clutter. However, there are times when it is very convenient to have results displayed in side-by-side windows. For example, if you run a dot plot you can zoom in to view sections of…
If you work with eukaryotic genomic sequences, you will likely have encountered coding (CDS) features that are split into multiple segments, with each segment representing a translated exon of the encoded gene. MacVector is very much aware of segmented features and ensures that all in-place translations (e.g. in the main sequence Editor with CDS translations…
MacVector displays amino acid translations in many different result windows. You can drill down to the residue level in the Map tab and see translations of CDS and other translatable features and see translations in the plain text views and the Quicktest Primer interface. The translations can be viewed as either single letter codes or…
If you are interested in looking for or evaluating mixtures of residues in .ab1 or .scf chromatogram files, it is important to be able to extract the raw data from the four traces. You can open .ab1 and .scf files directly in MacVector by using the File | Open menu item or by dragging files…
You can use MacVector to create beautiful graphical representations of sequences with control over colors, patterns, fonts, symbols and many other aspects of the layout. The easiest way to get the graphics into another application is to simply choose Edit | Copy, switch to the target application and then choose Edit | Paste. The graphics…
While MacVector does have a built-in Entrez browser (Database > Internet Entrez Search) you can easily import GenBank formatted text into MacVector via a simple copy and paste approach. Many sequence-oriented web sites have the option of viewing sequences in GenBank format. This format always starts with the text LOCUS and finishes with two forward…
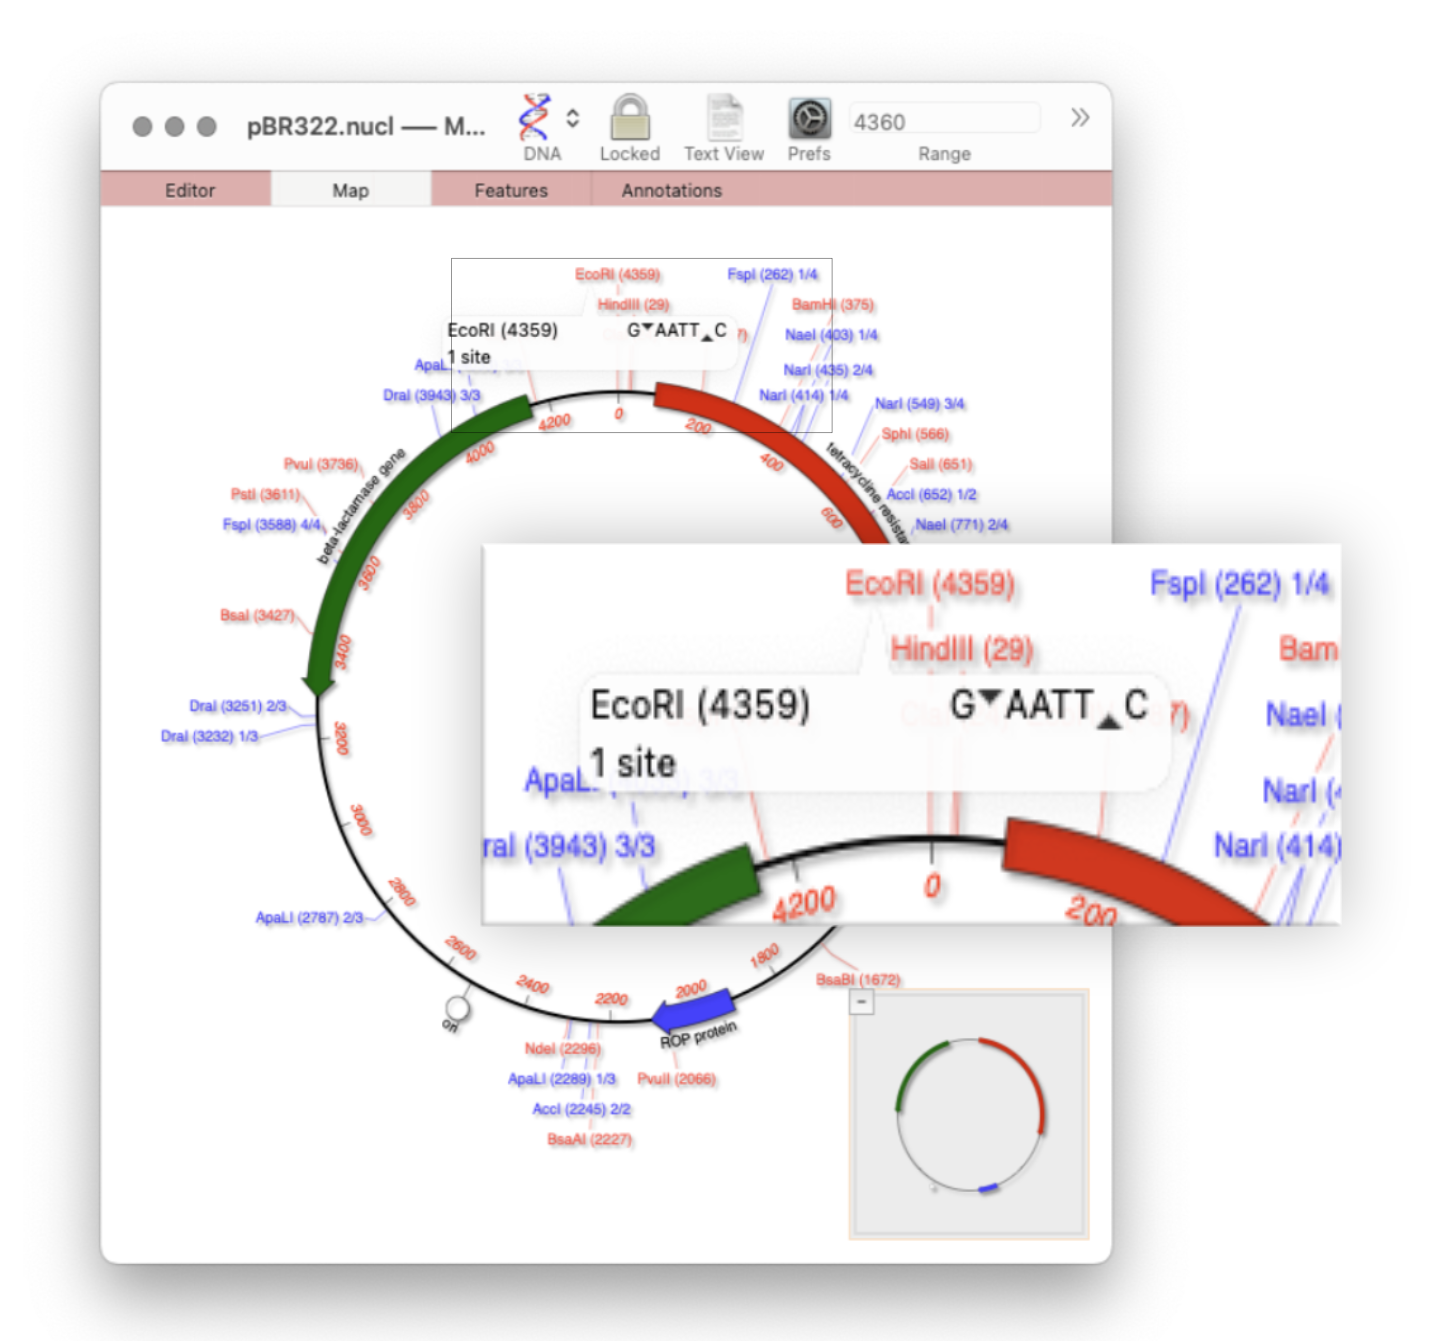
Quickly viewing the recognition sequence and cut site of a restriction site is very easy in the Map tab. If you hover your mouse over a restriction site in the Map tab, a tooltip will show you the restriction enzyme recognition site, the location of the cut site, and number of times that enzyme cuts…
It’s quite a few months since the last update on the development of MacVector for Windows. Work is progressing very well and a lot of the underlying functionality is now finished. The Cloning Clipboard, Restriction Enzyme analysis and QuickTest Primer tools are all done. The release is still some time away, but if you are…
When you copy a section from a long sequence and paste it into a new MacVector window, the original numbering from the original sequence is retained. This is very useful if you want to work on a shorter segment of a genome without losing the original numbering. However, sometimes it is preferable to have the…