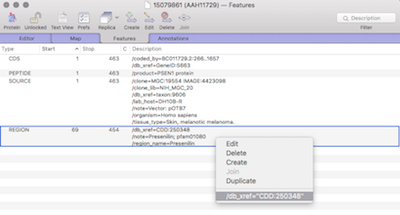
Sequences, or regions of sequences, can be linked to external databases. For example an entire sequence entry or for when annotation tools are used to annotate proteins with domain or motif information (for example InterProScan). Very useful for when you want to view more detailed or updated information. Within the Genbank specification, which MacVector extensively…
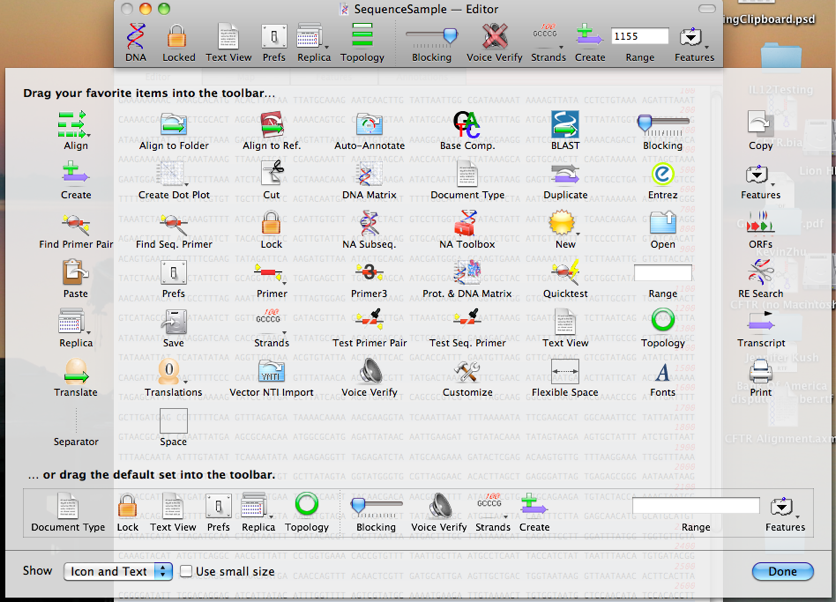
Like many Mac applications, MacVector takes full advantage of the built-in ability to add, delete and rearrange the action buttons on window toolbars. To make these changes, right-click (or [ctrl]-click) in the gray space on any toolbar and a context-sensitive menu will appear. Choose Customize Toolbar and a dialog will be displayed with all of…
You can align hundreds, or even thousands of protein sequences within MacVector using three different alignment algorithms – ClustalW, MUSCLE or T-Coffee. Once aligned, you may be familiar with the colorful display in the Editor tab. But there’s more to this than pretty colors. The default Color Group in MacVector is one called “Chemical Type”.…
MacVector’s Analyze | Create Dot Plot function can be used to compare entire genomes very quickly to get both an overall view of similarity (large inversions and duplications) while providing the ability to “drill down” to the residue level to see individual SNPs. One of the keys to ensuring the calculations complete in a reasonable…
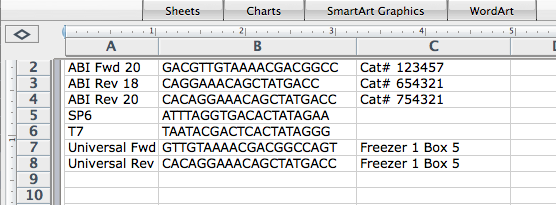
Many molecular biologists keep lists of their primer sequences in Excel or some other spreadsheet tool. Previously MacVector had a separate utility that allows you to import primers kept in spreadsheet format into a Primer Database for direct use within MacVector. With the release of MacVector 18.2 we have integrated this functionality within MacVector. Rather…
Overview We are very pleased to announce that MacVector 18.2 is available to download. MacVector 18.2 is a Universal Binary that runs natively on both Apple Silicon and Intel Macs. It is fully supported on macOS Sierra (10.12) to macOS Monterey (12). New features: Align to Reference Enhancements Context Sensitive Hamburger Menus Where a window has…
In recent years there has been an explosion of whole-genome sequencing projects. One common question coming out of this has been to ask: “Exactly what are the genetic differences between my sequenced organism and another related strain?” MacVector to the rescue! MacVector’s Compare Genomes By Feature… tool lets you see the differences between two annotated…
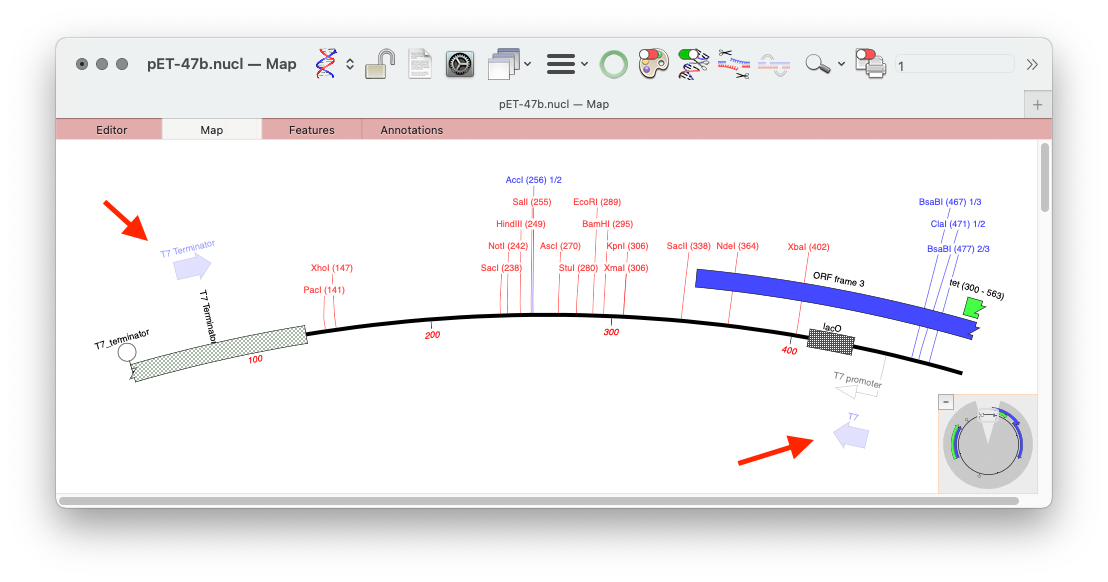
MacVector’s Scan DNA For.. tool allows you to automatically display restriction enzyme recognition sites, putative ORFs, CRISPR PAM sites, missing annotation and also it will display primer binding sites from your own Primer Database in each DNA sequence that you open. Here’s an example of a couple of primers displayed on the pET 47b LIC…
MacVector’s Align to Reference Editor and the Contig Editor in Assembly Projects have two useful functions for visualizing assemblies. The Shading button turns on background coloring of the residues in the upper pane, based on quality values (these can be from Sanger reads or from NGS reads). The scale ranges from a dark red for…
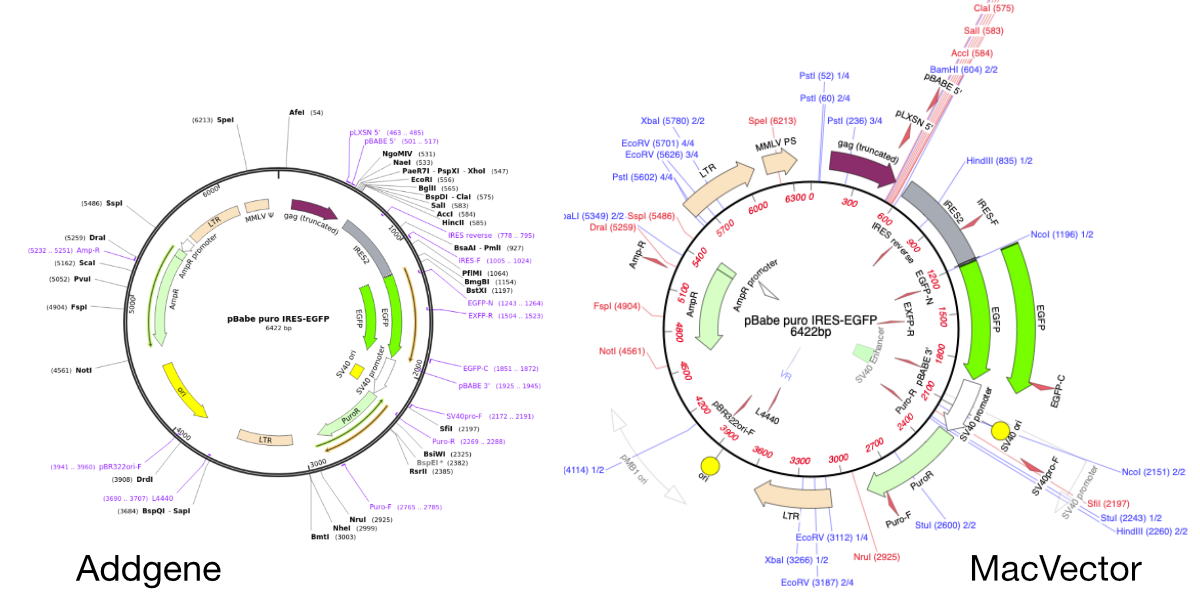
MacVector will directly import SnapGene DNA files. You just need to use FILE | OPEN or double click the file. This is very useful when downloading plasmid sequences from the wonderful Addgene plasmid repository. Here’s a plasmid sequence downloaded from the Addgene website in Snapgene format. It’s been opened directly in MacVector by double clicking…