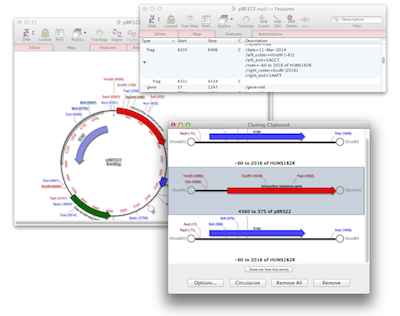
Designing and documenting cloning strategies is easy with the Cloning Clipboard. You can perform quite complex ligations by simply dragging compatible ends together. Not only that but every step is documented and recorded in the resulting sequence, so you always know where each fragment came from.

Ligating a single fragment into a vector is as straightforward as selecting two restriction sites and using EDIT | DIGEST, then selecting target sites in a vector and then EDIT | LIGATE. Every digestion places the fragment on the Cloning Clipboard and you can ligate these fragments by clicking on one end and dragging it onto the end of a different fragment. It fully understands compatible overhanging sticky ends preventing you from accidentally creating biologically impossible molecules. It even allows you to fill or cut back ends to make them compatible.
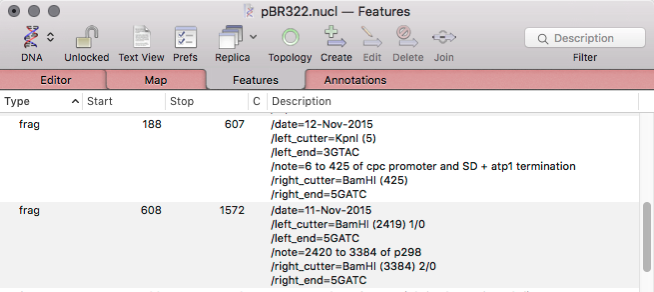
However, when you open this construct a year later, you don’t want to have to look back in your lab book to know how you generated it. Neither do you want to have to email a lengthy description every time you send a plasmid to a colleague. MacVector does all this for you and fully documents the cloning strategy that you used. Every single ligation is documented as a FRAG feature which is annotated to the target sequence. This is regardless of whether you used COPY | PASTE for a single fragment, or whether you ligated multiple fragments on the Cloning Clipboard and ligated that fragment into a cloning vector. All FRAG features from previous ligations are preserved in new ligations. So if you joined three fragments together on the Cloning Clipboard, then ligated those fused fragments into a vector you would have four FRAG features documenting exactly what you did.
As well as the source of the fragment and timestamp, the enzymes used to digest the fragment, and any modification of the overhang are also recorded. So if in the aforementioned scenario if you had Klenow treated a fragment to remove an overhang, that would be documented in the FRAG feature for that fragment.

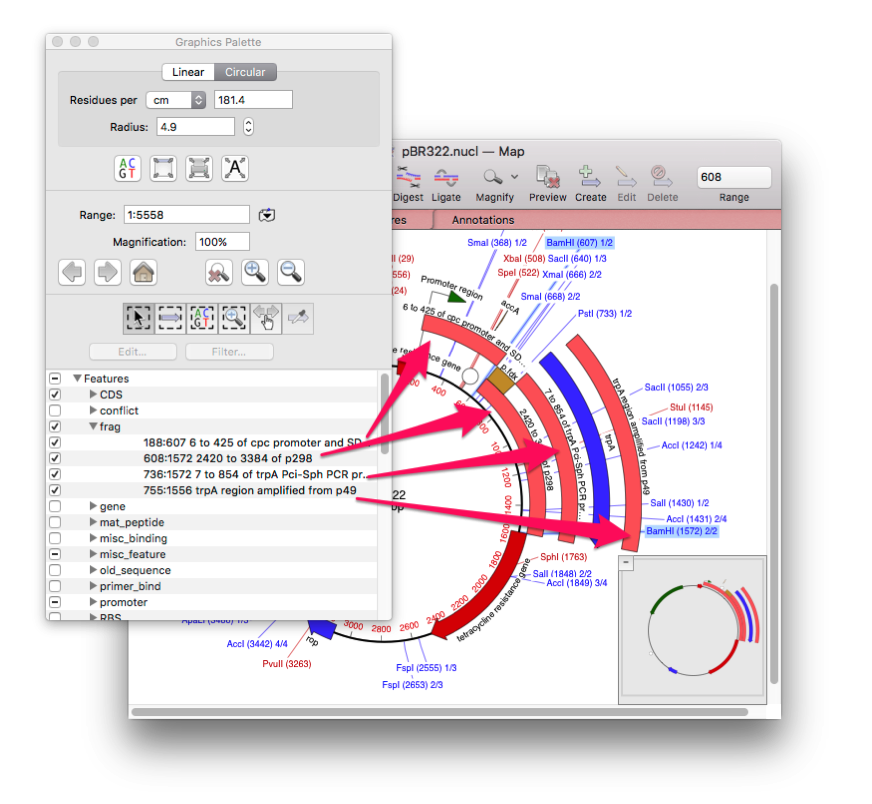
By default FRAG features are hidden, but you can easily make them visible to visualise the history of a construct by selecting the FRAG feature in the Graphics Palette and making them visible.
